Create T-Shirt Designs with your iPhone Camera
In this video, you will learn how to use an iPhone camera to create a white toner t-shirt design.
The cameras we have in our smartphones are more than capable of creating some pretty amazing t-shirt designs. And when we talk about the iPhones new Portrait camera mode, we can take our t-shirt designing skills to the next level.
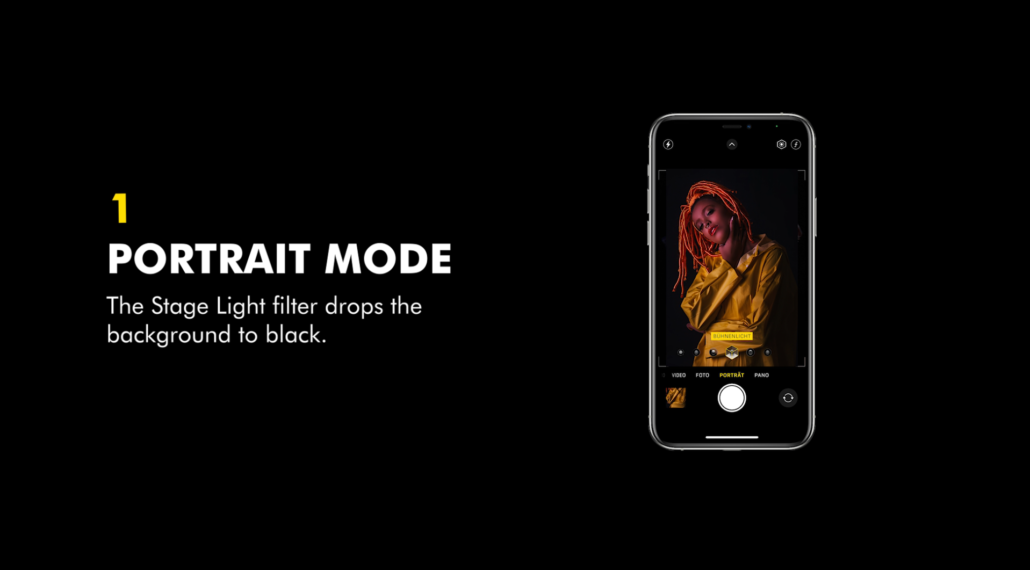
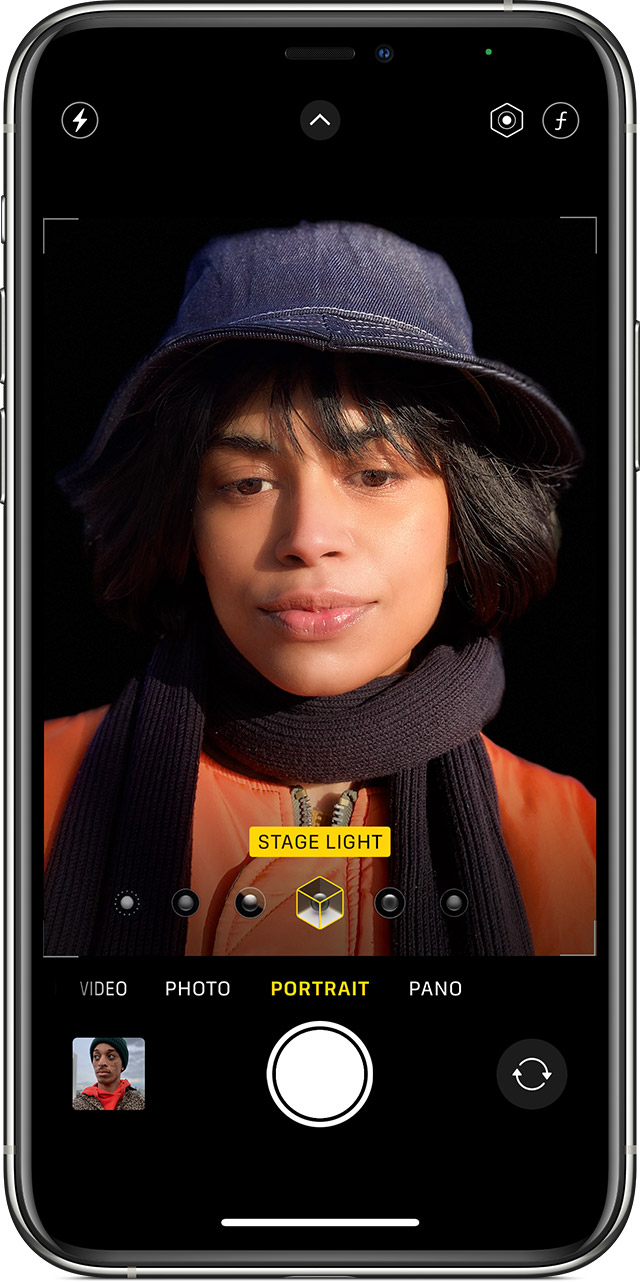
Apple’s Portrait camera mode, has several options, but what we are really interested in is the Stage Light option. What the Stage Light options does is once you take a picture, the background is replaced with a black background. This is exactly what we are looking for.
Designing for White Toner
With White toner laser printers and heat transfer designs, we need to take all the steps we can to manipulate the printed design, so that it feels soft on the garment, the washability is high and the printing costs are kept as low as humanly possible.
Nobody wants to buy an expensive t-shirt with a design that feels like plastic and which cracks after the first wash.
That’s why, when creating white toner designs, images which appear on a black background are the best kind of designs. Of course, white toner laser printers can also print black too. But when we process our images through an image RIP software, like our TransferRIP software, we have the opportunity to remove this black background. Why is this? It’s because the TransferRIP software can remove the black parts of our images and designs. This is especially important when we are printing on black or dark coloured garments.
No Image Backgrounds
Who wants images with a white background or even a coloured background? Not me. Images with backgrounds on them, unless you are printing a sublimation print onto white Polyester, you will get a hard and stiff design on the t-shirt. Sublimation printed designs on white polyester garments are famous for their extremely soft designs. You pretty much can’t tell that there is a design printed on the garment.
But we are talking about white toner laser transfers. And with white toner laser transfers, we have an issue with white. Unlike sublimation, white toner laser printers can print white and even the lighter colours of the image, because white is placed behind these colours.
Rasterize = Save Toner, Higher Washability
If you really want to save toner and increase the washability of the garment, you need to rasterize your images. The rasterization options in our TransferRIP software for example, the dark media raster option for dark garments, removes all the dark colours from our images.
When we have no black or dark colours in our designs, our designs become softer. And two more things happen when we remove the black toner from our prints – they become easier to wash and they are cheaper to print.
Rasterizing our images has a great advantage to our business, as we increase our profits, our customer returns are lower and the process is smoother.
How to create t-shirt designs with your iPhone Camera
Take photos in Portrait mode
- Open the Camera app on your iPhone and swipe to Portrait mode.
- Once here, scroll through the lighting options until you get to the Stage Light option.
- Position your subject within the circle.
- Tap the Shutter button.
The Camera app lets you know when you’re too close, too far away, or if the area is too dark. You can also use True Tone flash, set a timer, and apply filters. After you take a photo, you can use the built-in editing features to do things like crop and auto-enhance.
Some iPhone models have multiple options for Portrait mode, like 1x or 2x. Just tap the 1x or 2x icon to switch between the options. With iPhone XR and iPhone SE (2nd generation), the rear-facing camera must detect a person’s face to take a Portrait mode photo.
Adjust Depth Control and Portrait Lighting
After you take a photo in Portrait mode, you can adjust the level of background blur and the intensity of Portrait Lighting effects. Here’s how:
- Tap a Portrait mode photo in your library.
- Tap Edit, then tap the Depth Control button at the top of the screen to adjust Depth Control or Portrait Lighting button to adjust Portrait Lighting. A slider appears below the photo.
- Drag the slider left or right to adjust the effect. A grey dot above the slider marks the original value for the photo.
- Tap Done.
Remove the Portrait mode effect
- Select the photo that you want to change.
- Tap Edit.
- Tap Portrait at the top of your screen.
- Tap Done.
If you change your mind and want to re-add the Portrait mode effect, go back to Edit and tap Portrait again.
How to Import & Edit Images in Photoshop
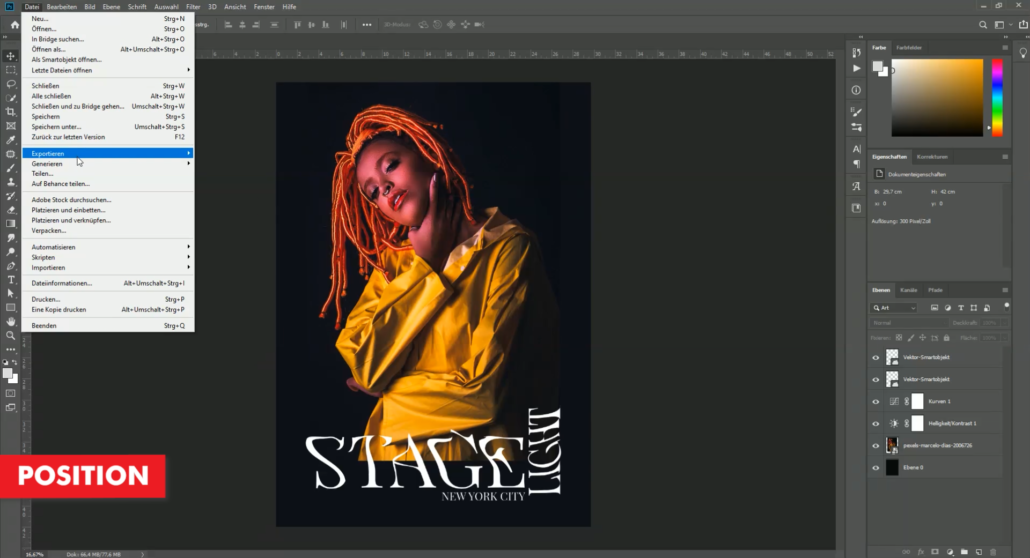
- Open your image in your chosen image editing software
- Create a new print file:
- A3 or similar
- CMYK colour profile
- 300 DPI
- Black background
- Import image
- Scale image to fit
- Create text and manipulate as desired
- Position the text around the image
- Save or Export your image as a PSD or PDF file format
- Import your image into the TransferRIP software
- Choose the Dark Raster option with the following settings:
- 27 Mask
- 170 Shadow Tolerance
- Euclidean Dot Shape
- 52.5 Angle
- Print your design and press to your garment
Conclusion
For more information on the different ways you can create t-shirt designs for white toner printers, please take a look at our other tutorials. Our tutorials are primarily focused on how to make your life easier, so you can create designs for heat transfer papers and the OKI white toner laser printers.
Or sign up for the White toner transfer newsletter and we will send tutorials, tips & tricks and inspiration straight to your inbox.
You can learn more about our products over at our products page. We have a large range of products, which help you create and customise almost any garment or surface. Our goal is to help your business grow.
Leave a comment below. Let us know how your designs turned out and if you have any new topics which you would like to see, then please let us know too.

