TransferRIP: How to Rasterize Images (Beginners)
If you are using the TransferRIP for the first time, then you may not realise the power which lies at your fingertips. The TransferRIP software is a very powerful tool for optimizing images in preparation for the Digital Heat Transfer process.
Today we will take a look at one of the many features, which the TransferRIP offers – How to rasterize images. Rasterizing images not only softens the design on the garment, but also improves the washability and durability of the design, as well as, saving you money by reducing the amount of toner required.
Follow the 4 simple steps below and start printing intelligent designs.
1. Import Images
The first thing we need to do is import our image into the TransferRIP. Click here to see how images should be saved before importing them into the TransferRIP software.
Open up the TransferRIP and go to Step 2 and the Job Selection window:
- First, choose the print size (see image below).
- Click “Load File“.
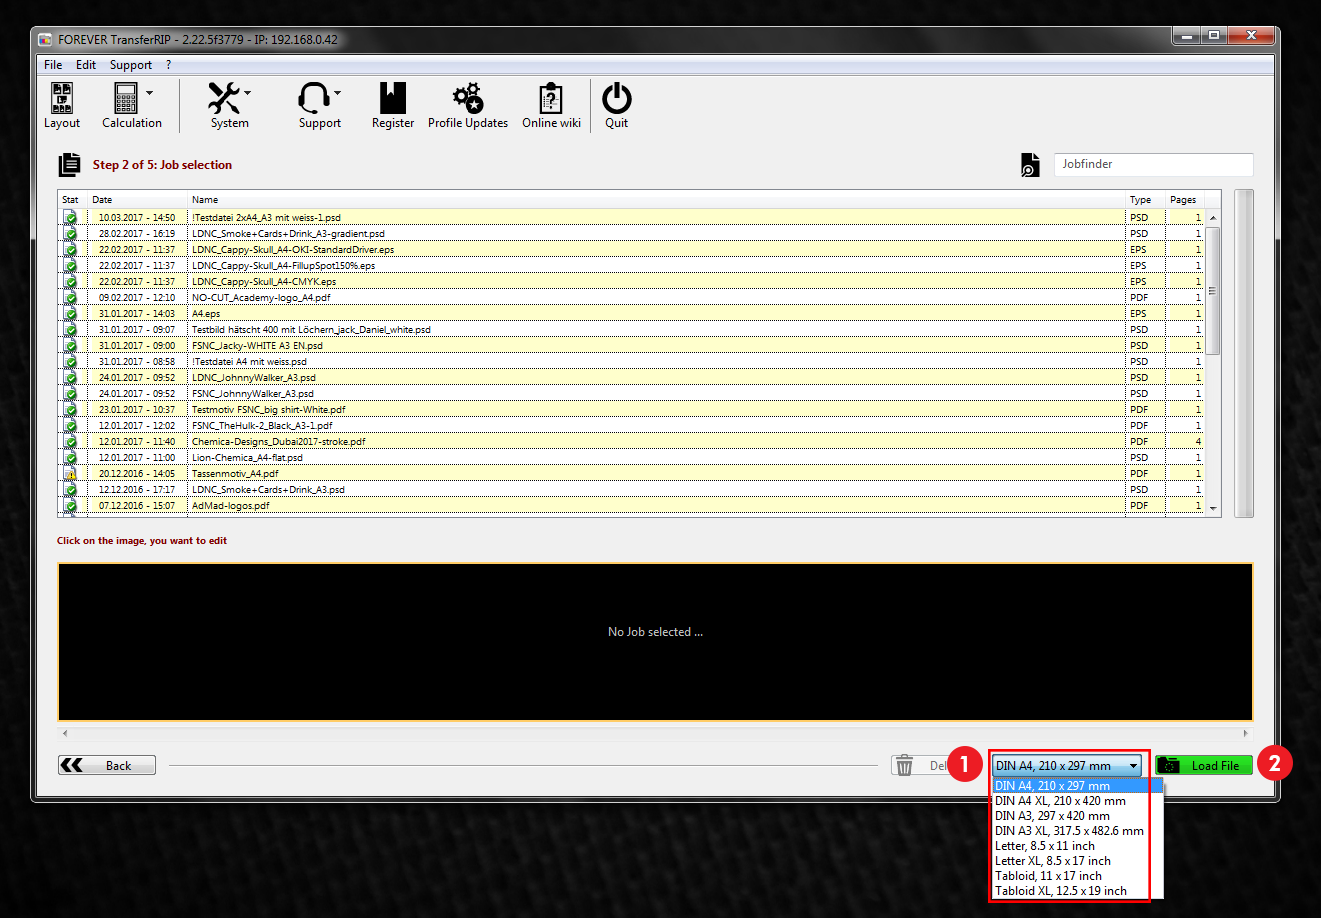
Step 2: Choose Print size. Click image to zoom.
- Search the image on your computer.
- Click “Open“ to begin importing the image.
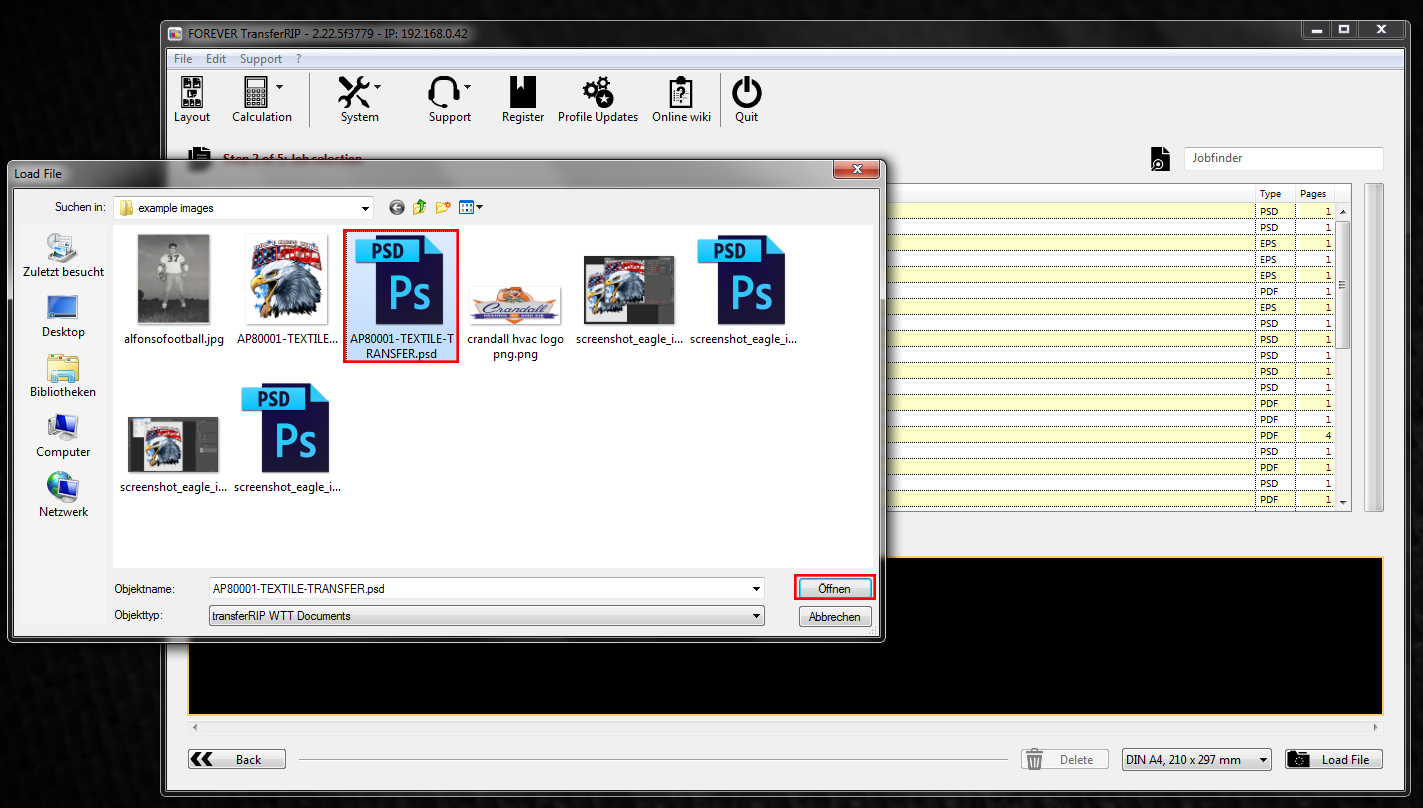
Step 2: Import image to the TransferRIP. Click image to zoom.
Once the image has been imported into the TransferRIP, it will appear on the top line (see image below).
- Click on the image name (1) to activate the preview image below (2)
- Check that the image size is correct. The print size appears below the preview image.
- Click on the image to progress to Step 3 and the Colour Management options.
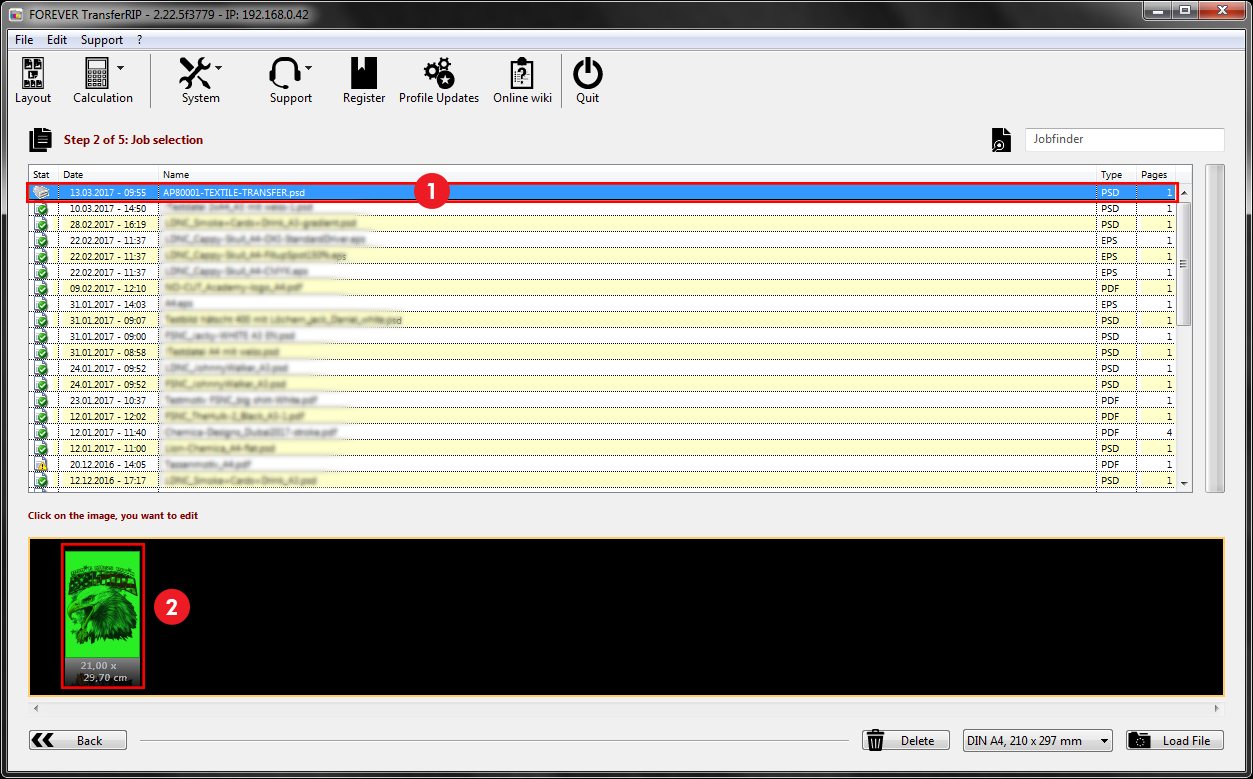
Step 2: Job Selection. Click image to zoom.
2. Color Management
In Step 3 we have the Color Management settings:
- “Selective Color Correction” option replaces colors within the image.
- Below the Selective color correction, we have all the standard tools for editing the colors within the image.
- “Remove Color” simply removes a color from the image.
- “Substrate Color” allows you to preview your design on different color backgrounds.
- “Manage Color Settings” allows you to save your color setting or load previously saved settings.
- Click “Next” to proceed to Step 4 and the White Toner Controls.
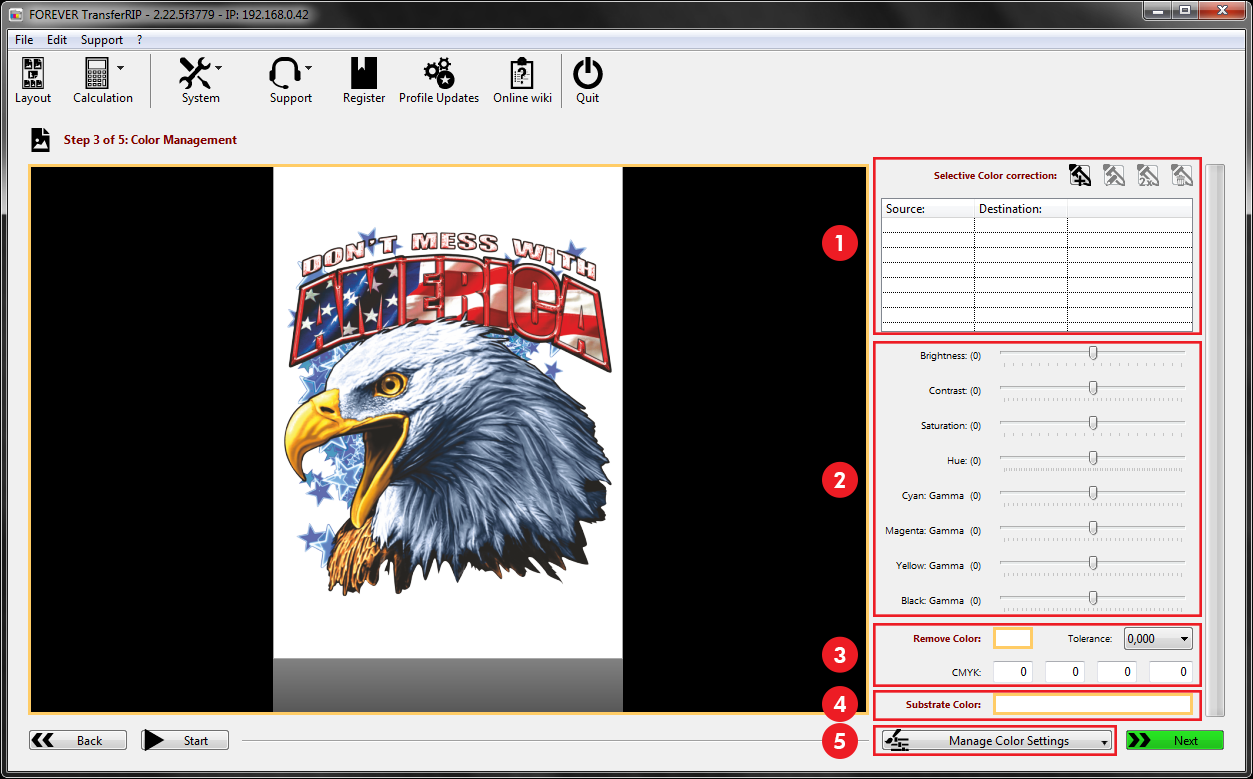
Step 3: Color Management Controls. Click image to zoom.
3. White Toner Controls
In Step 4 we can control the White Toner amount.
- Turn the White Toner on/off .
- 150% is the standard value in the TransferRIP and this amount is good for the image in the example. NOTE: If you are printing Mugs, increase this amount to 300% and change the white toner density to +3.
- If your design has a white outline after printing, use the “Underfilling” option to remove it. “1 Device Pixel” is enough for this image.
- Click “Next” to progress to the final Step 5 and the printer controls.
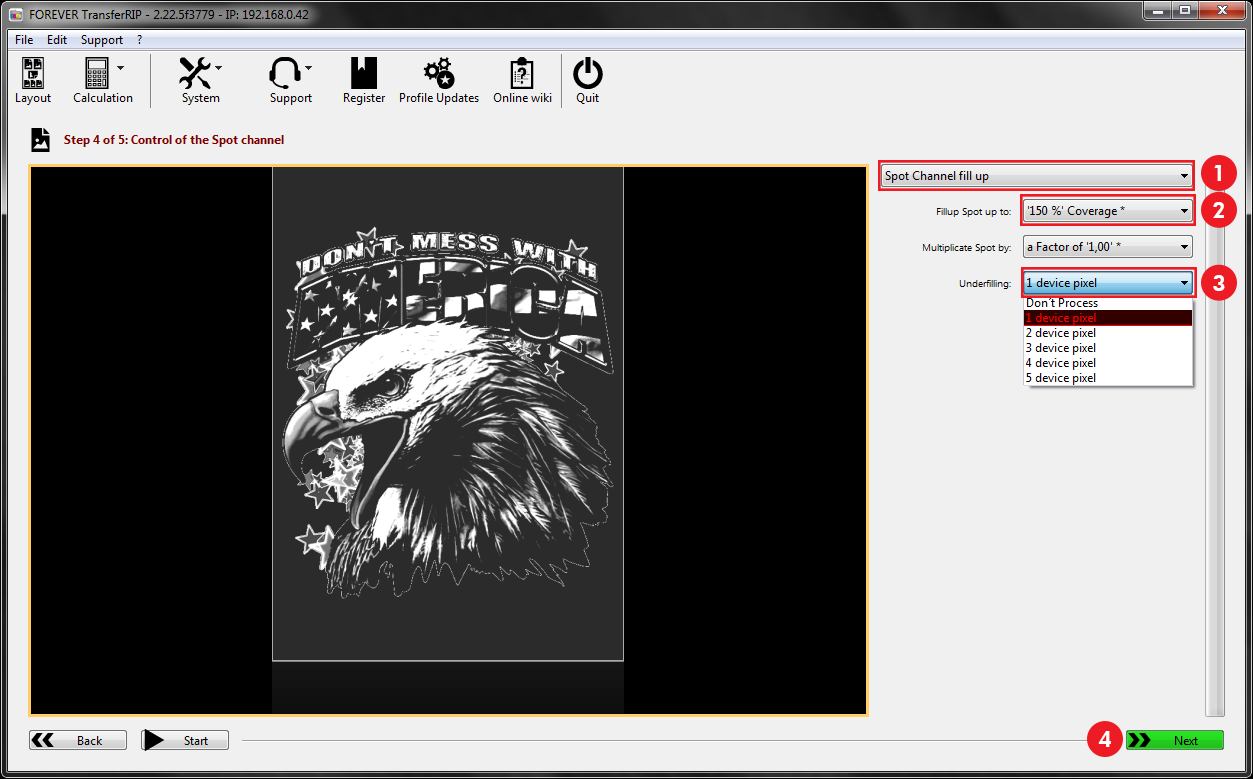
Step 4: White Toner Controls. Click image to zoom.
4. Rasterization
Step 5 is the Printer and Rasterization options:
- Make sure the correct printer has been chosen, the amount of prints and whether the image needs to be mirrored or not. If you can read the text in any preview images, then you should mirror the design. The example image needs to be mirrored.
- Choose a Light or Dark garment raster option. For this example, we have chosen a dark raster option because we are pressing it onto a black t-shirt.
Raster: “Use screening as configured as a Mask, recommended for Dark Media” (see image below).
Mask: “28.00” (How big the dots are).
Shadow Tolerance: between “150-200” (Removes more or less dark colours from the image).
Dot Shape: Line, Euclidean (The shape of raster).
Angle: 52.5 (Standard Raster) or “0” – When using a Line raster, change this option to fit your image and the garment lines. “90” left to right & “0” up and down. - Make sure that “Transparency” has been set as the Media Type.
TIP & TRICKS: To remove the need to click “ONLINE” on your printers display window;
- You can unclick the “Custom Media” box.
- Change the Input Tray to “Automatic Tray Detection“.
- Output Tray to “Left side of Printer (Face Up).
More Tips & Tricks can be found here.
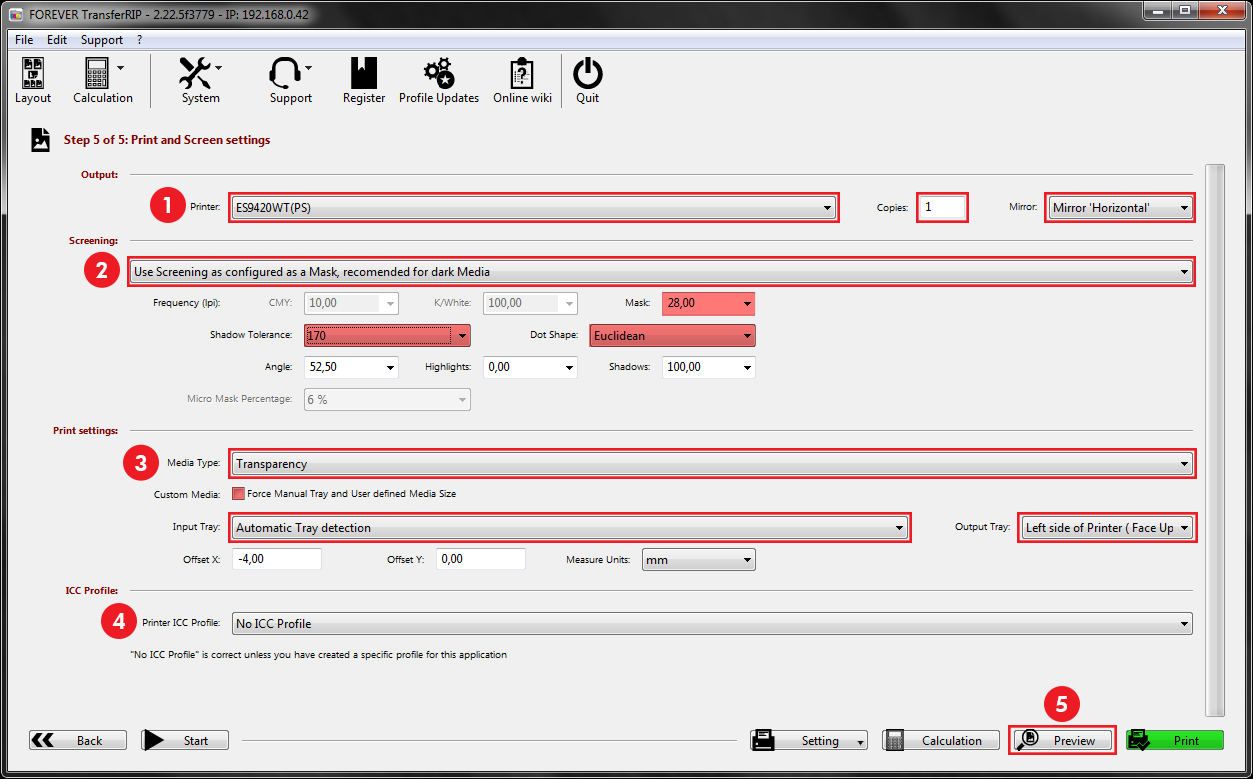
Euclidean Raster example. Click image to zoom.
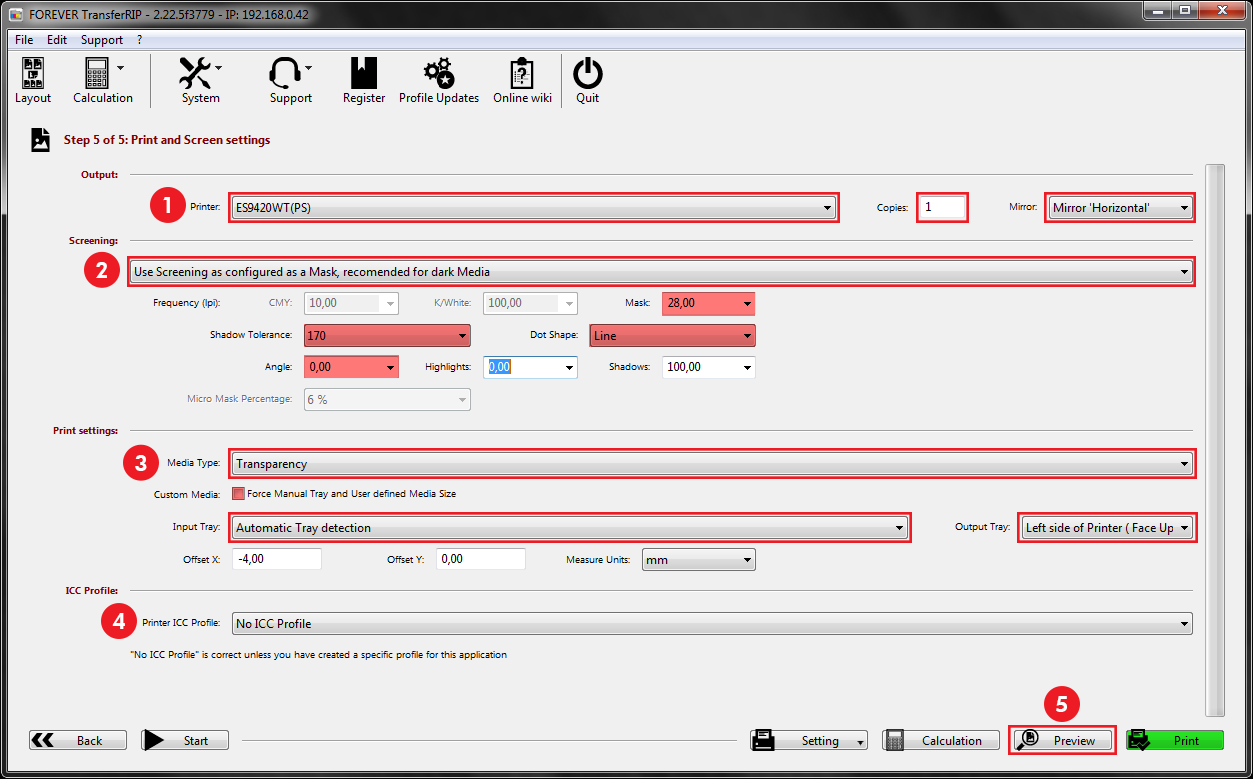
Line Raster example. Click image to zoom.
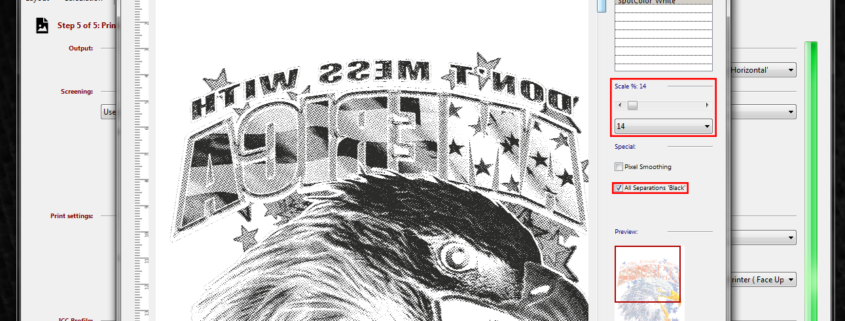
Once you have chosen your raster setting, clicking the “Preview” button allows you to preview your image before printing the image.

Preview Image before printing. Click image to zoom.
Click “Print” to begin printing your design.
Final Thoughts
If you found this Tutorial helpful, please leave a comment below. If you would like more tutorial like this, please let us know, either via our contact form or in the comments below.



Leave a Reply
Want to join the discussion?Feel free to contribute!