Before sending your transfer images to print, there are a few steps which you will need to follow in order to get better results from your printouts.
1. Size Matters
First, open up the image in your chosen image editing program. Here we are using Photoshop. Once the image is open, the first thing we want to do, is to setup up the correct paper or print size.
- Click “Image“
- Scroll to & Click “Canvas Size…“
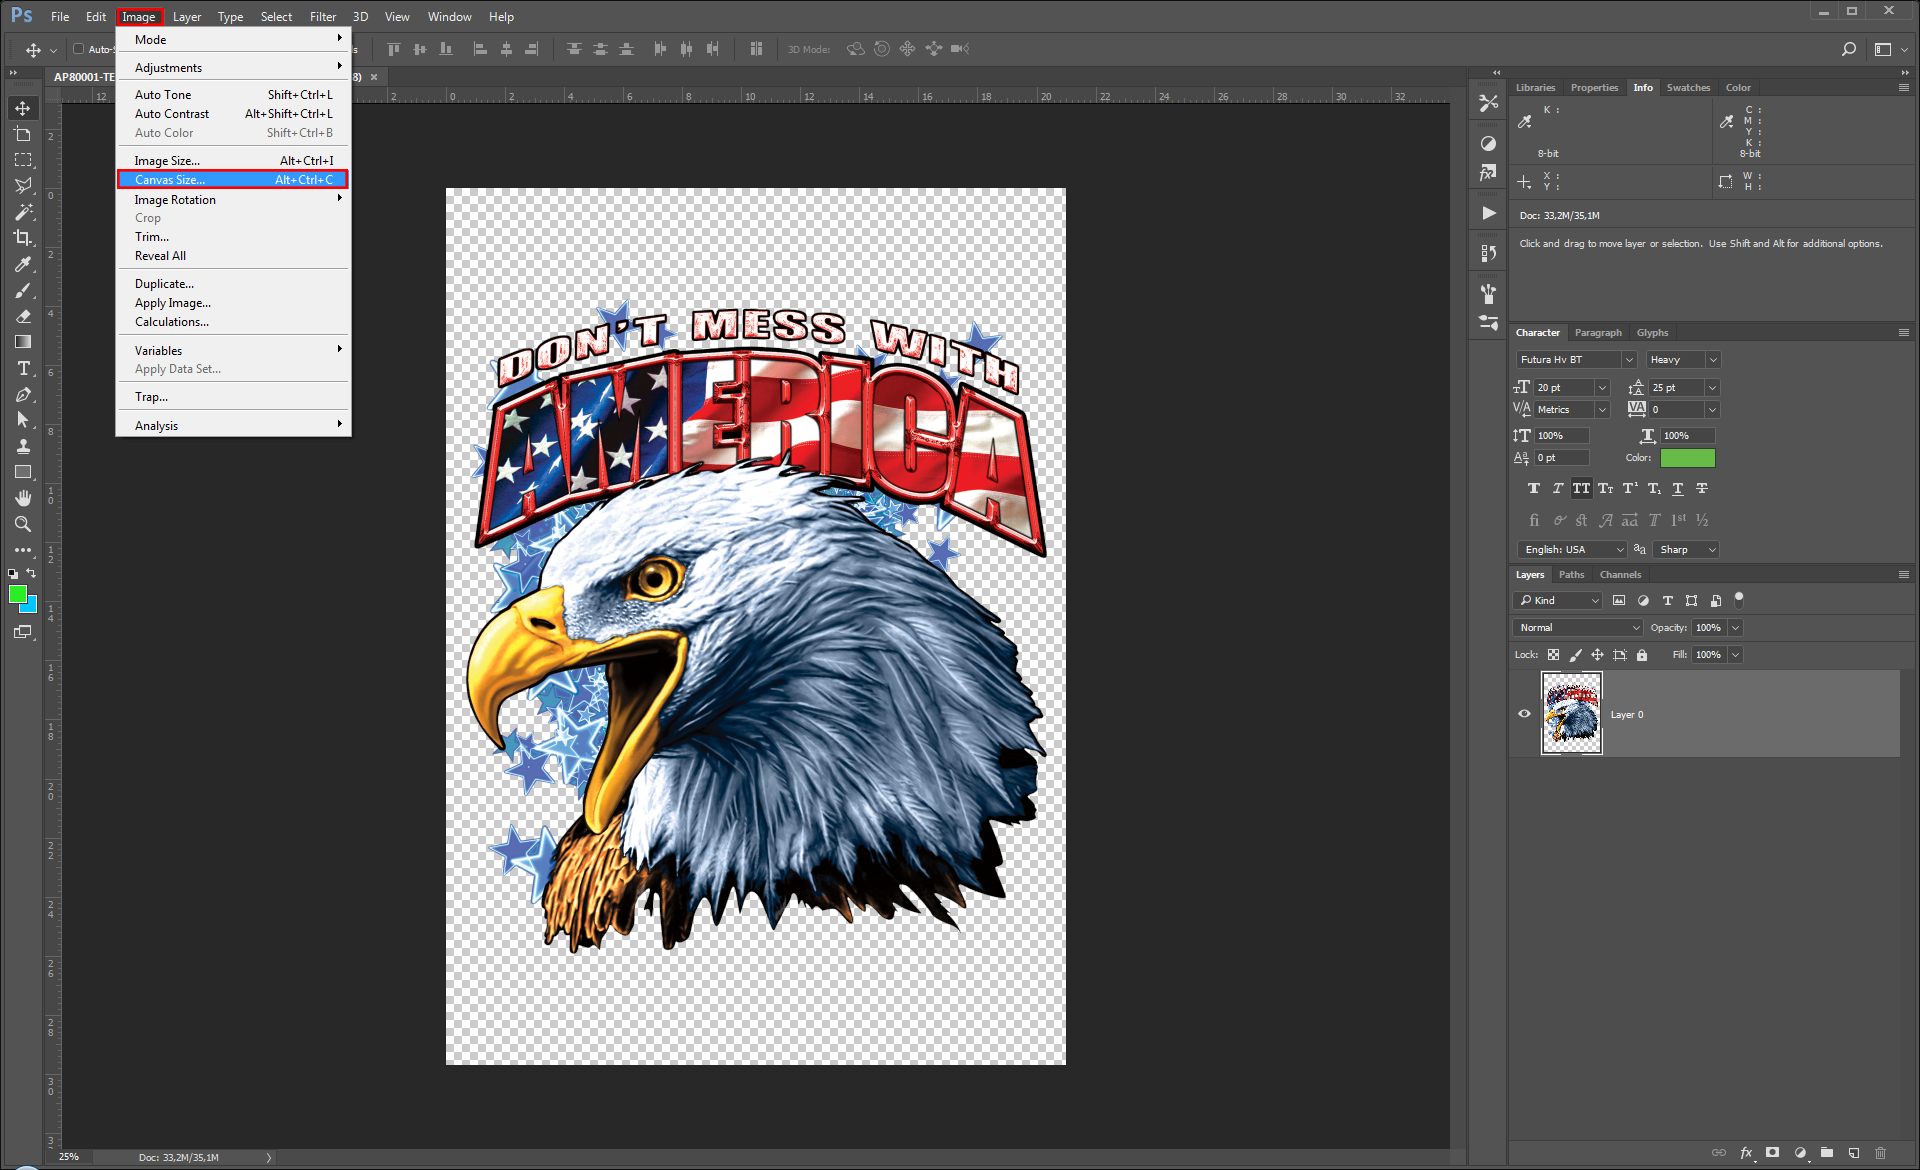
After clicking “Canvas Size…“, the Canvas Size window will appear (see the below image). The Canvas Size window is where we can setup the paper size. For this example, we changed the canvas to DIN A4 or 21 cm x 29.7 cm
- Change the width and Height to 21 cm x 29.7 cm.
- Click “OK” to activate this change.
2. Check the Image Resolution
Once the canvas size or the paper size has been setup, the next thing we need to check is the resolution of the image. This is very important, if you want your images to look as good on the t-shirt, as they do on the screen. Setting the image resolution to 300 DPI/PPI is the best way to do that.
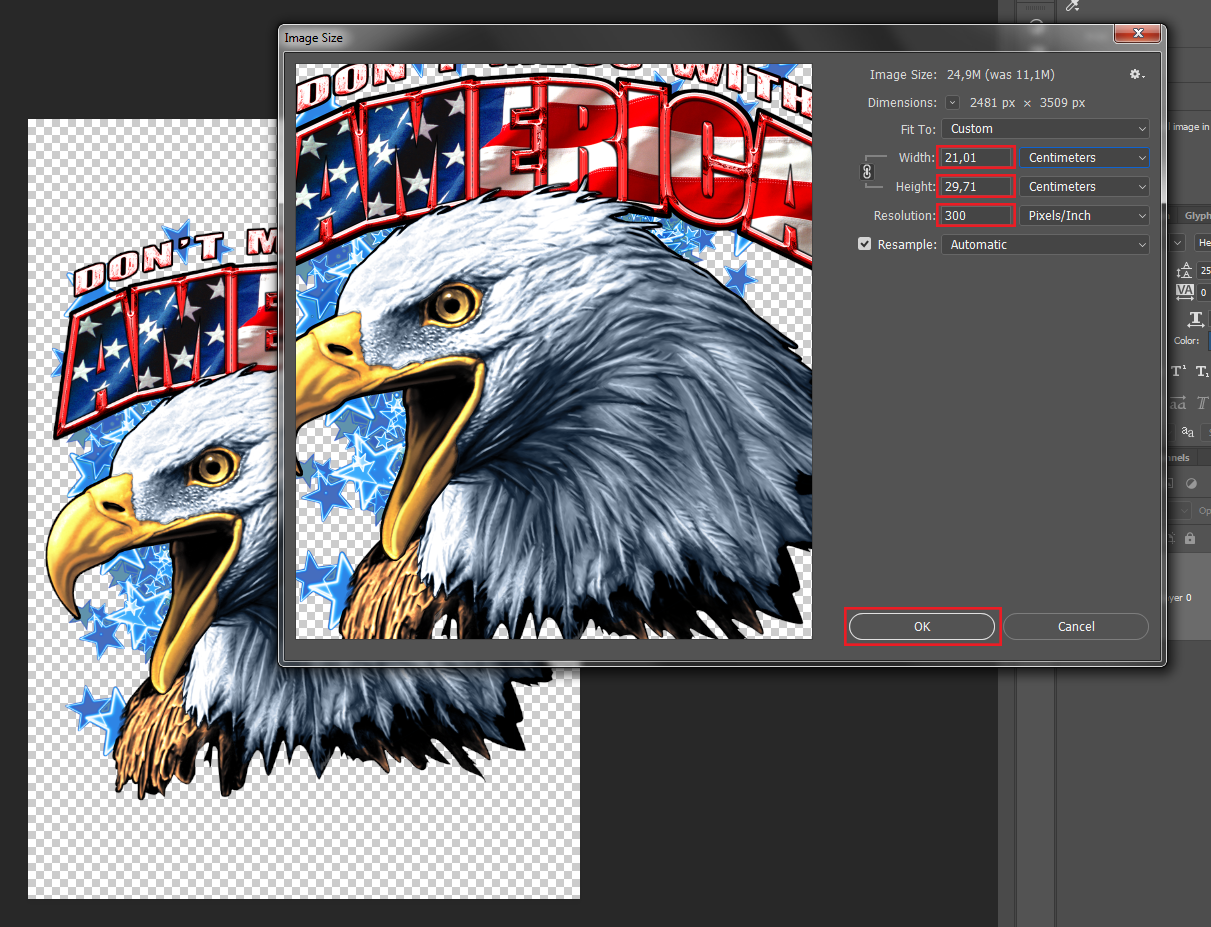
- Click “Image“.
- Scroll and Click “Image Size…“
INFORMATION:
What does DPI & PPI mean? DPI stands for “Dots per Inch” and PPI stands for “Pixels per Inch”. 300 DPI or PPI is the industry standard for printed images. Do not forget, your printer will use “LPI” which is the printer resolution, meaning “Lines per Inch”.
Once the Image Size window open, check that the image size and the resolution are correct:
- Type “300” in the resolution field. Note: This may change the image size slightly. You can see in the image below, “00.01” cm has been put on the end of the page size.
- Correct the image size.
- Click “OK” to activate this change.
3. CMYK vs RGB
The next change we want to make is to the image color settings. The two main color options which we need to look at, are CMYK and RGB.
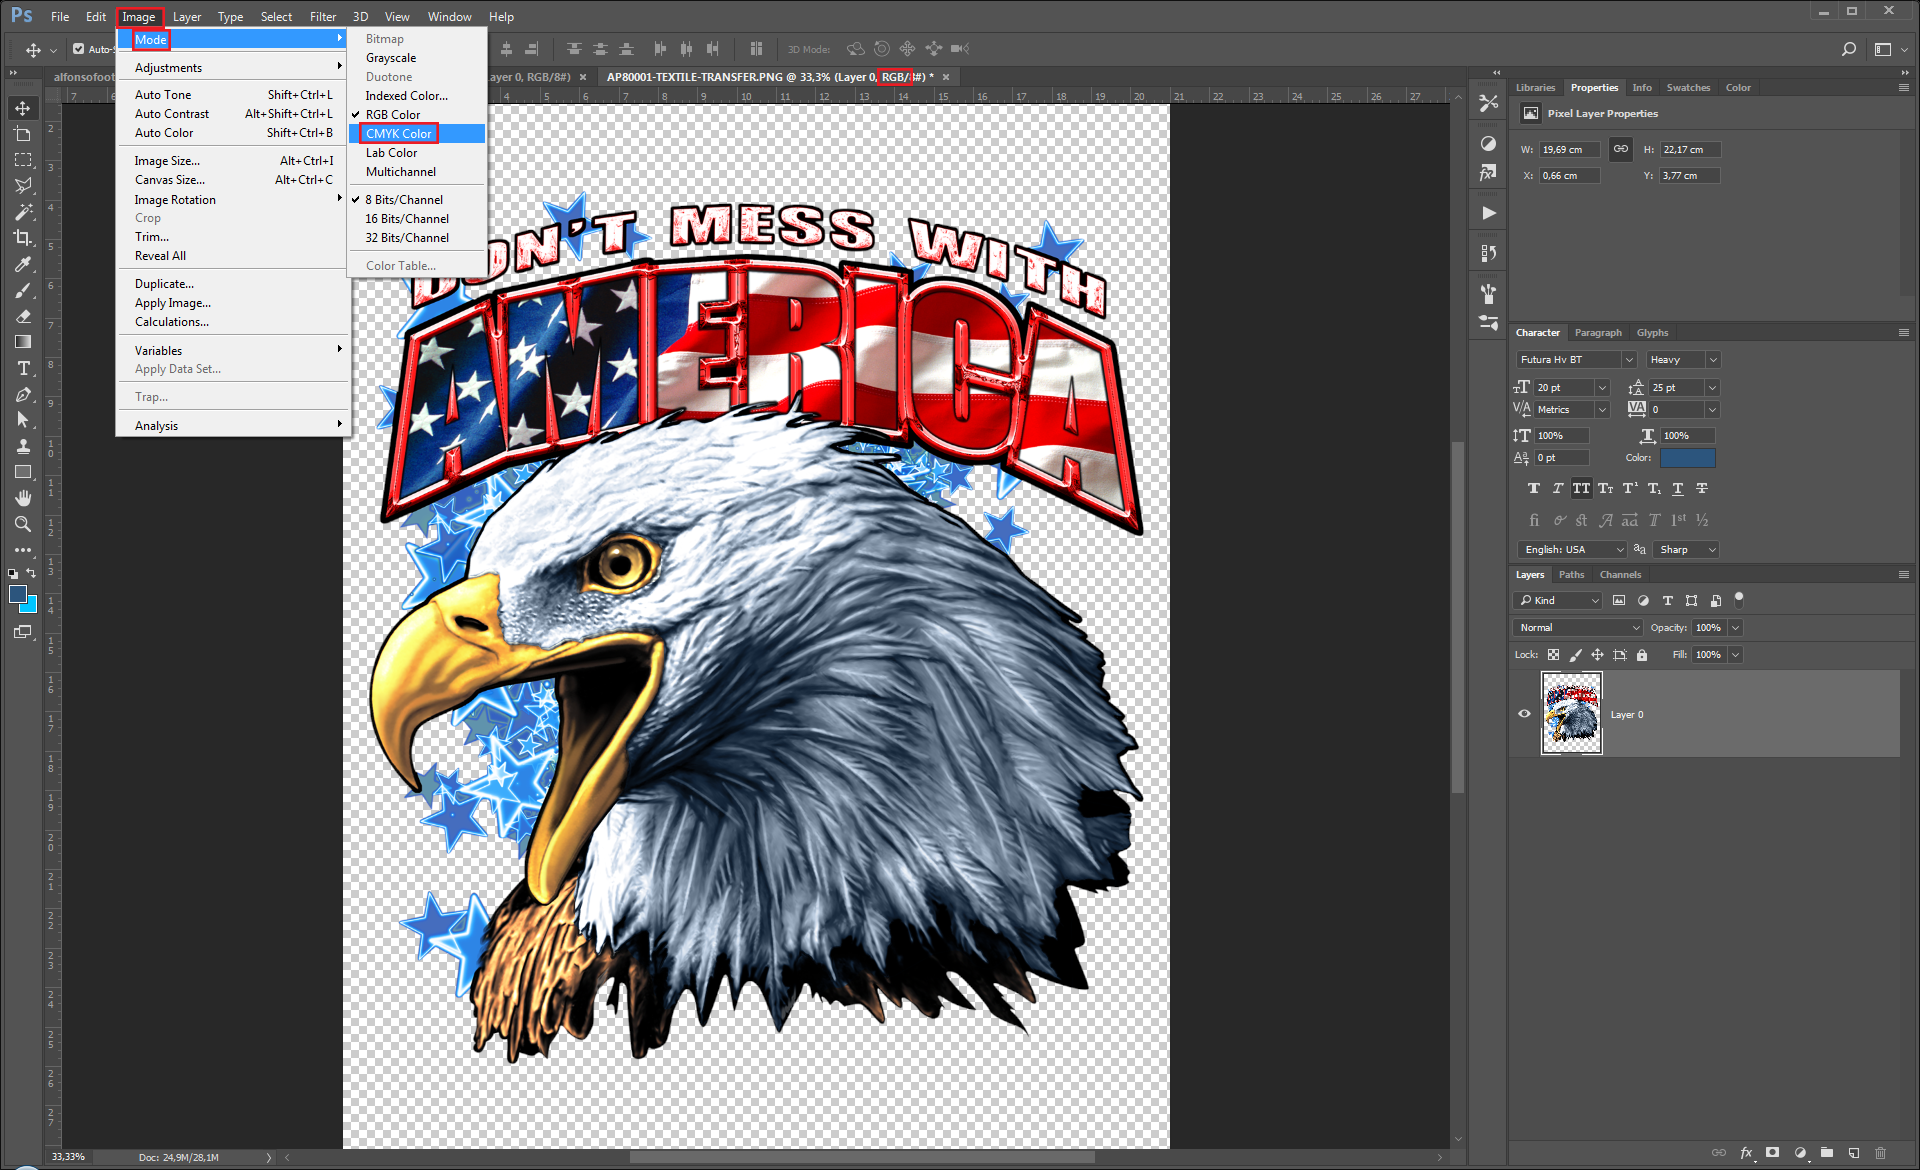
- CMYK stands for Cyan, Magenta, Yellow & Black – you will notice that these colors also match the colors found in your printer – that is why CMYK is best used for printed images.
- RGB on the other hand, stands for Red, Green & Blue – these colors appear on screens, digital devices and websites.
To check the color settings of your image:
- Click “Image“
- Click “Mode“
- Scroll to & Click “CMYK Color“
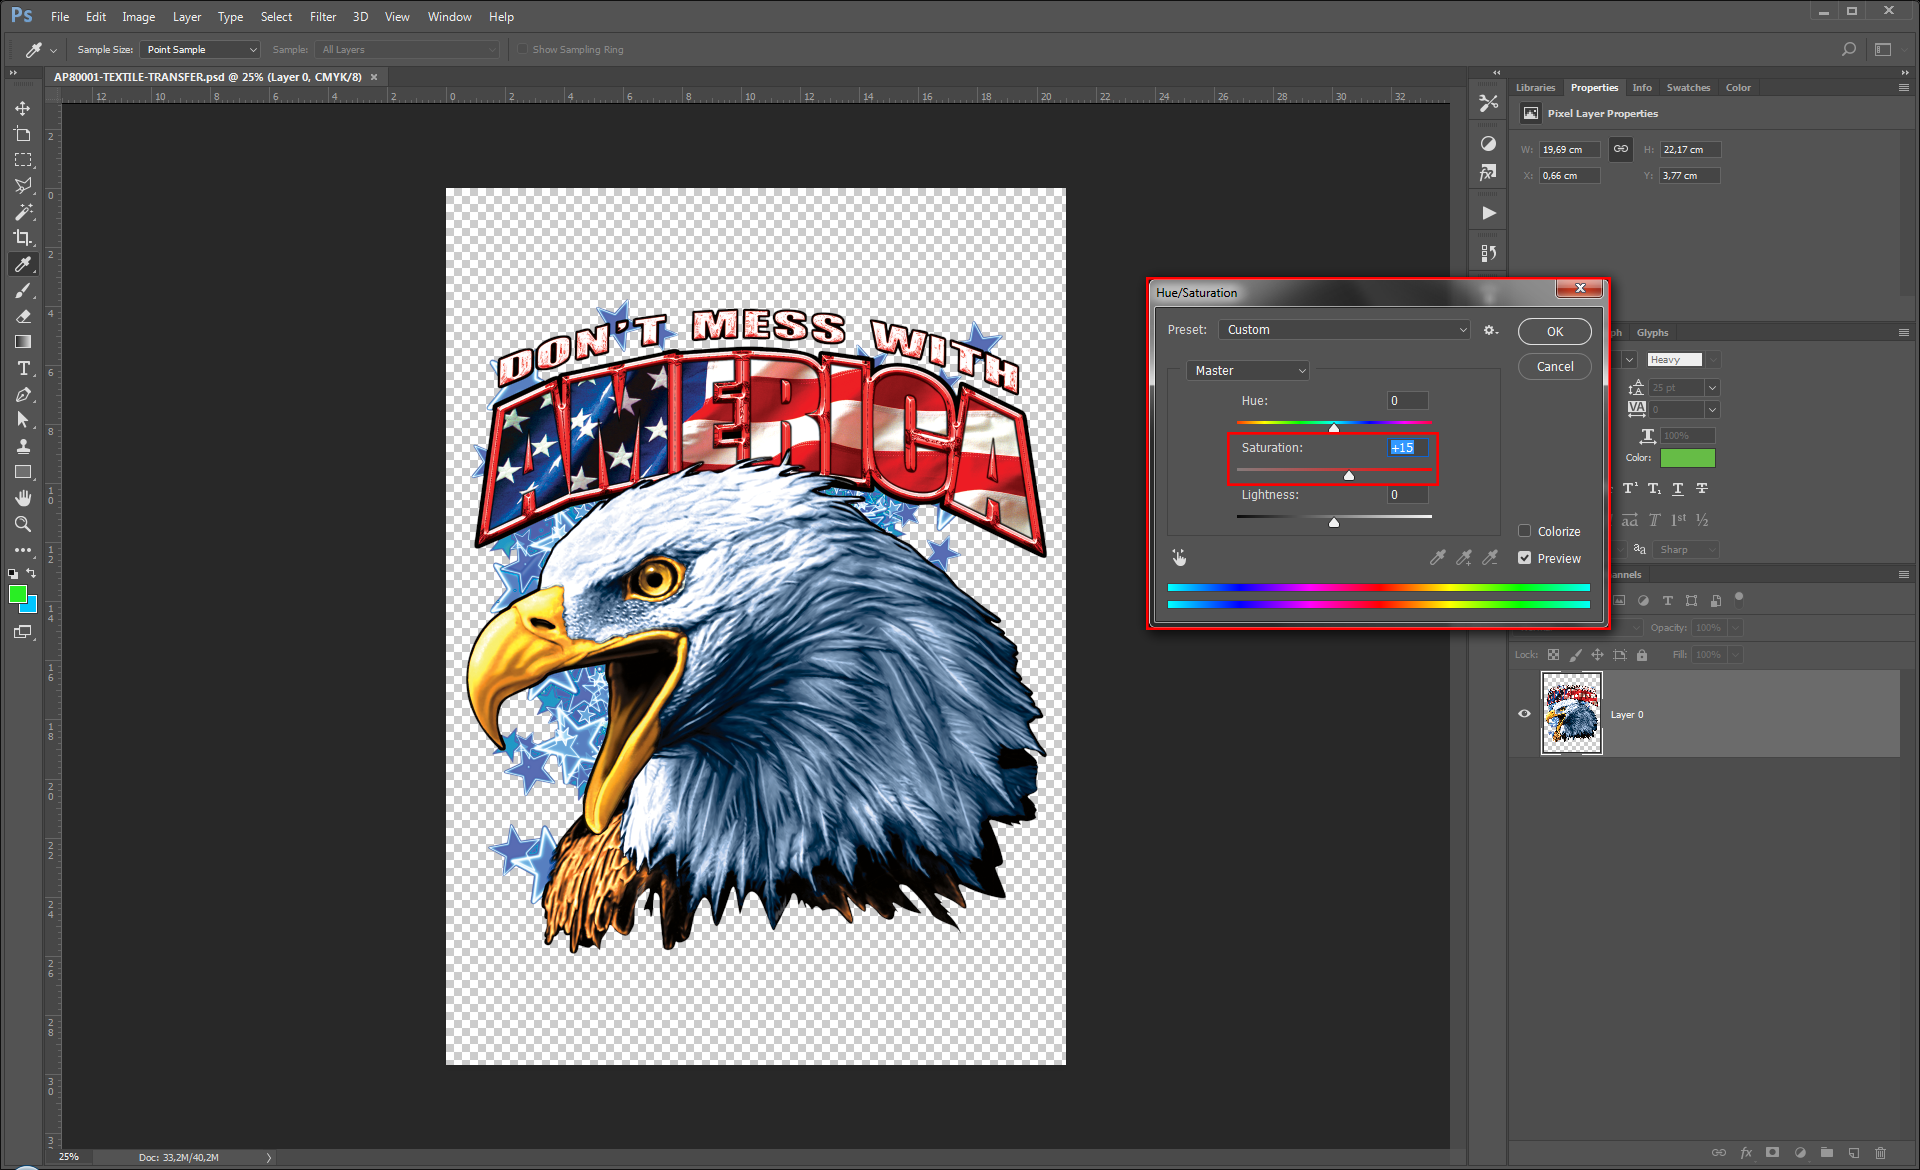
NOTE: If you are changing the image colors from RGB to CMYK, this may change the onscreen colors. Using the Saturation settings, can bring back the brilliant colors to the image (see image below).
- Click “Image“
- Click “Adjustments“
- Click “Hue/Saturation“
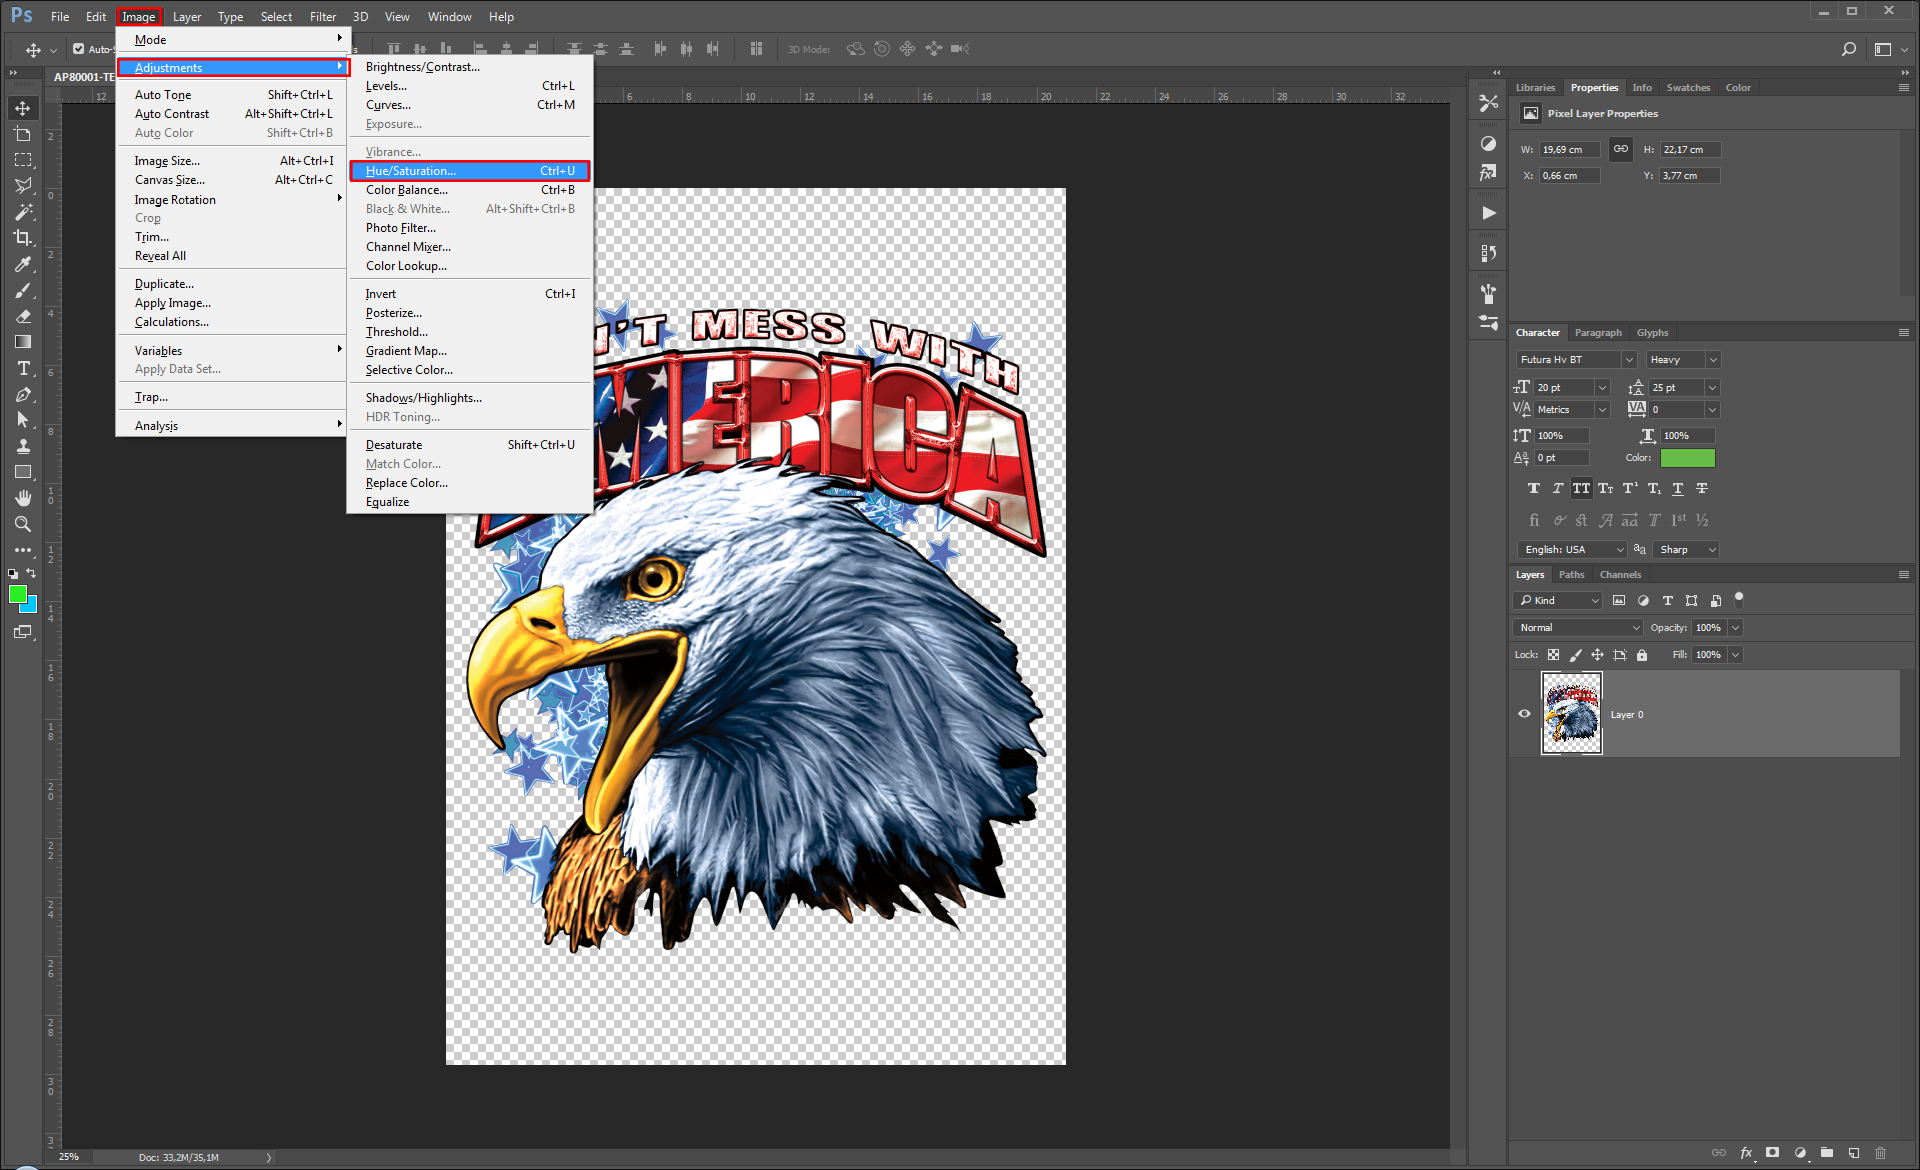
- Move the Saturation bar until your colors look better (see below image).
Final Thoughts
If you found this Tutorial helpful, then please leave a comment. If there are more issues, which we can help you with, please ask away.

You must be logged in to post a comment.